Hey guys!! Man am I excited to finally share Aspyn’s Living Room and Entryway makeover with you!!
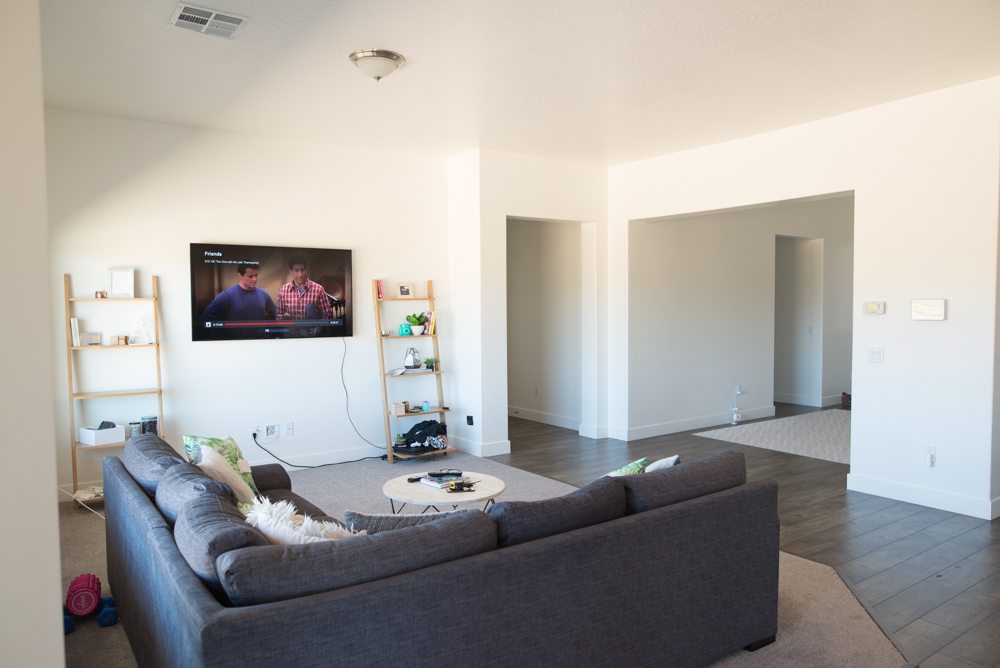
If you’re new to the block, welcome! For the last little while I’ve been working on a space makeover for youtuber Aspyn Ovard. She lives in the same smallish town that I do and it was a really exciting challenge to update her builder grade space into something totally her. This is what it looked like before:

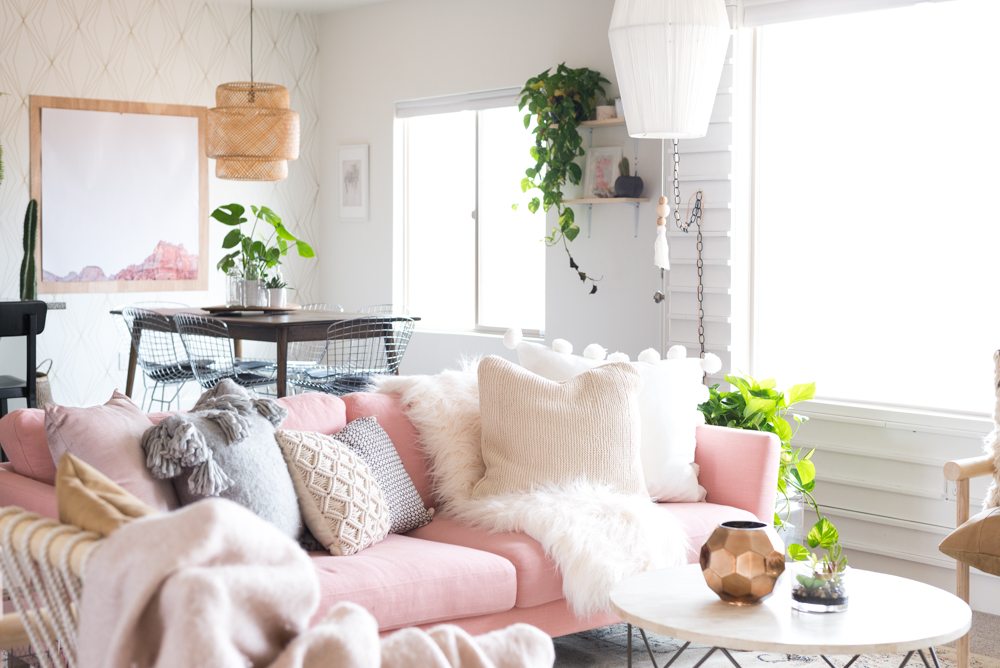
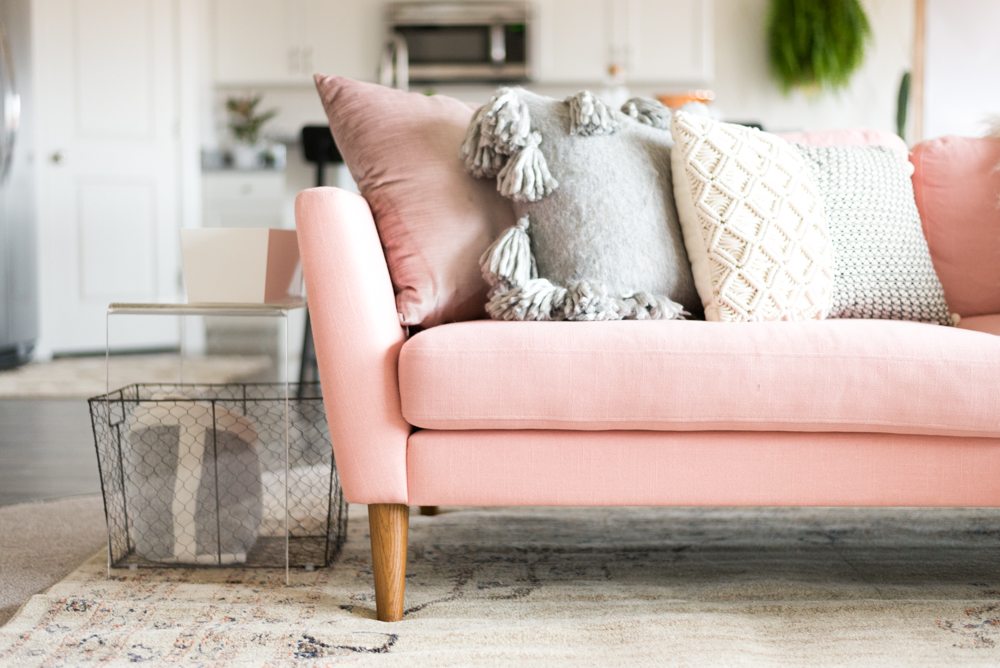
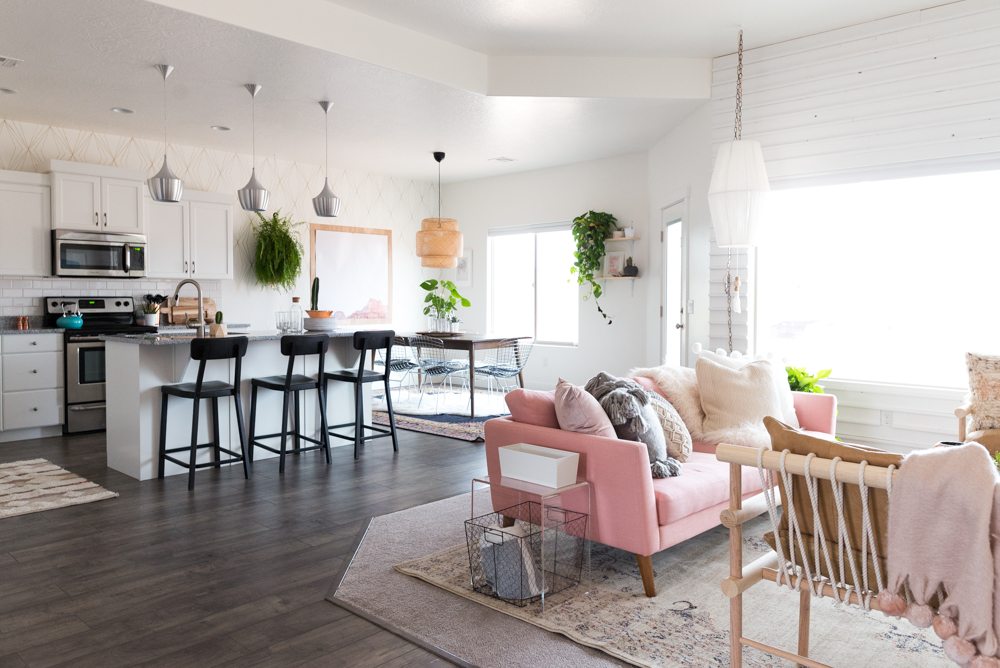
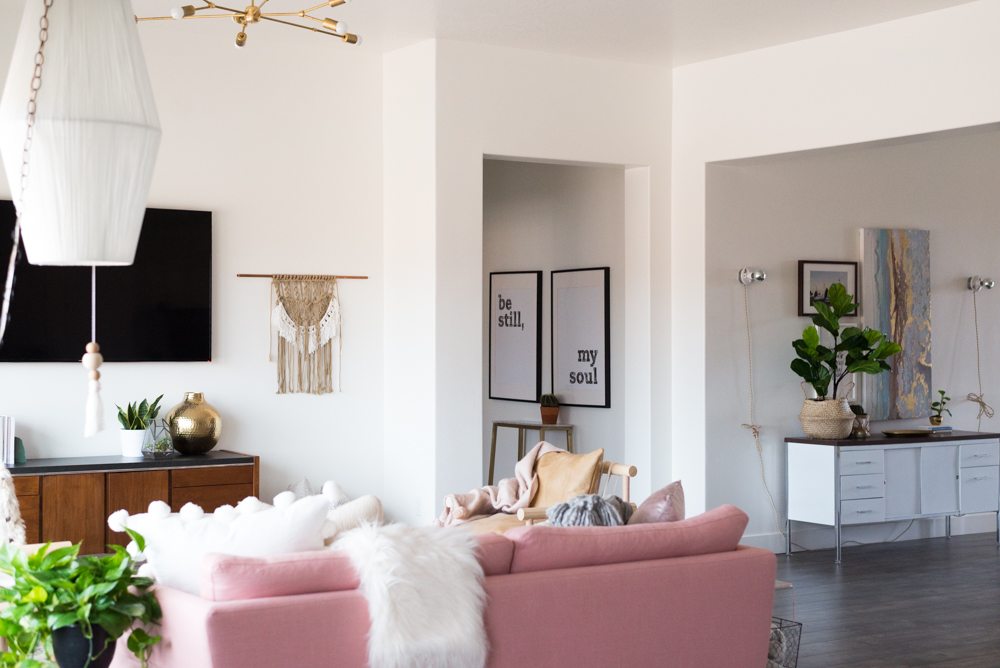
The jumping off point was the couch, her request was something pink and the Emil from Article was absolutely perfect (and its a killer price point!!) When you’re decorating with a show stopping couch (especially if its an exciting color) you have to remember that its the star of the show. Everything else is wonderful and amazing, but not the star of the show. Also, every time I say star of the show I think of Wild Hearts Cant Be Broken.

Here’s a tip for all of you novice thrifters, sometimes in the context of a thrift store surrounded by bad couches and florescent lighting things don’t look that great. You may wonder if it actually is something worth buying. My advice if you find something that sparks a little hint of potential in your heart, is to find the markings on it and do a little googling. See if there is any info on it out in the real world away from the thrift store smell and people with shifty eyes just waiting for you to walk away from it. (I’m usually one of those people with shifty eyes BTW.)
Can we just for a second talk about the chairs!?! Oh my gosh I LOVE them. LOVE LOVE LOVE. For months I hunted for a pair of chairs and came up empty handed. I found loads of great single chairs but a pair was just so dang elusive! About 3 weeks before I was wrapping up the makeover I found a pair of blue velvet ones on FB marketplace but they were in dire need of a reupholstery job and my guy Mark (the same one who did the couch in my living room) was booked until the new year. Which meant they were a no go and are now in great company with the 300 other chairs in my storage units. #itsfine #hoarder
One late night inspiration hunting session later and I decided that these guys from Urban Outfitters were TOTALLY DIY friendly, all I needed was a drill press (yay for new tools!) luckily so many of you agreed.
A photo posted by Mandi Gubler | Fearless DIYer (@vintagerevivals) on Nov 27, 2016 at 7:21am PST
I love how they turned out. Instead of using leather straps, I used cotton rope and sort of love it 100x more.
The cushions are from an old rescued couch that got skinned and sewn together. As great as new leather is, there is just something so much better about worn in slouchy leather. After 2 years my couch is just getting to the worn in perfection stage and I’m happy to hurdle right over that process as often as I can.
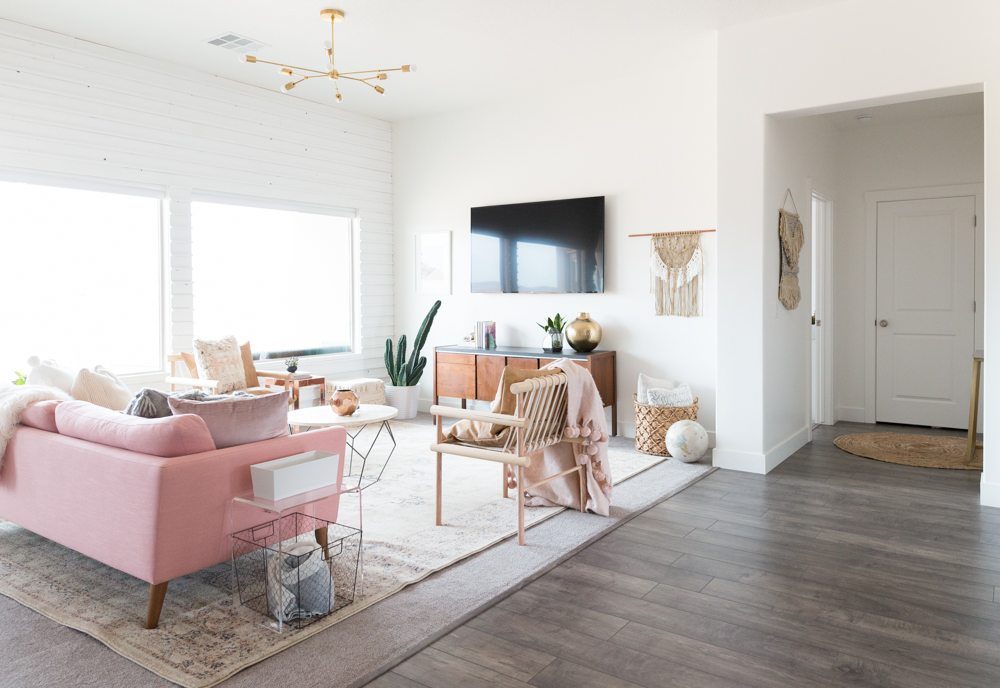
Ok, lets talk about the wall treatment. Aspyn wanted the colors to be muted and the couch was taking up most of our color budget, so it was time to embrace textures. Plank walls are an easy DIY, but they’re kind of so easy that you see them everywhere and they all look the same. Which we just couldn’t have. Everytime I look at this wall it reminds me of a cool scandinavian house in the mountains. It just feels right. The pattern is so simple but has such a punch of texture.
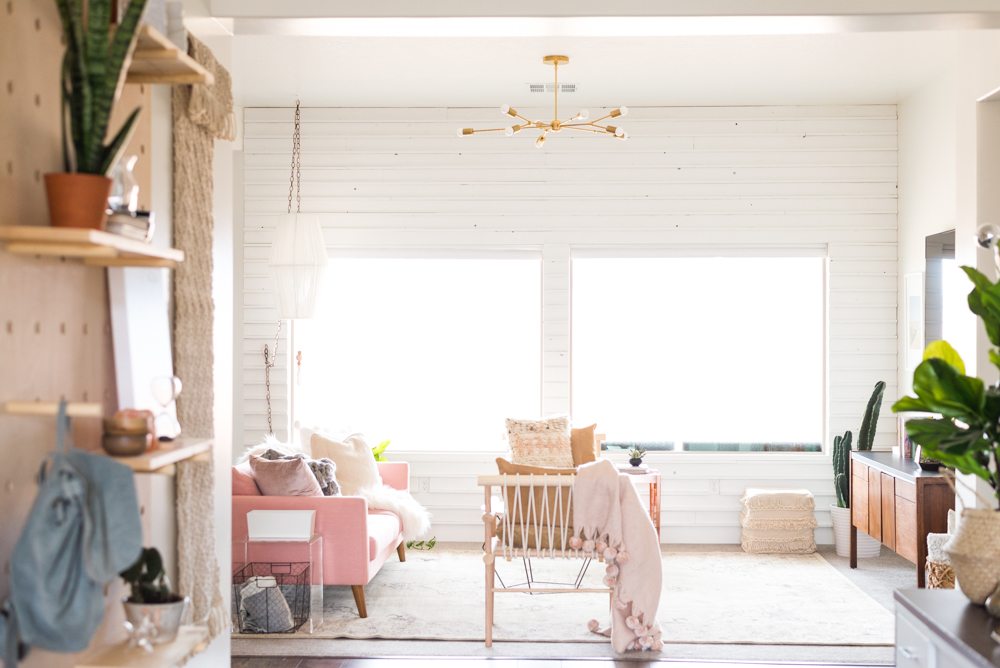
K lets just have a heart to heart about the lights for a sec can we? The hanging light is something that I have been DYING to do for months and just never got around to it. So picture this, you’re walking around the thrift store and see a whole bunch of bad, gross, and otherwise quite unsavory lampshades. You say to yourself, “Sad. No one will ever love them.” Then you see me, running like a crazy person (with my shifty eyes) and hoarding them all for myself. For what reason?! To make lights just like this!! Stay tuned for the tutorial, and start snatching up those lamp shades cause everyone is going to want this in their house.
The previous ceiling light was of the bosom variety and you know how I feel about those. Boob lights are BAD. Making lights is one of my favorite things, so of course I had to make something modern and super on trend. Tutorial coming for this bad boy too, and the best part is that it will cost you less than you think.
The rug is where Aspyn and I have a difference of opinion, I absolutely love the vintage boho vibe that it’s putting down, she’s wanting something a little more modern, so we’re on the hunt for one thats less old world and more geometric. Rugs are such a fantastic way to totally change the vibe of a space, swapping this one out is going to cut out the boho by at least 68% ;). If you’re looking for a massive rug at a mind-blowing price you are going to DIE when you see this.
I ordered a really cool macrame piece from amazon handmade and didn’t get it on time so I took my 3 day old ponytail to Joann and got the supplies to make my own. I love the two tone colors and the swagged piece.
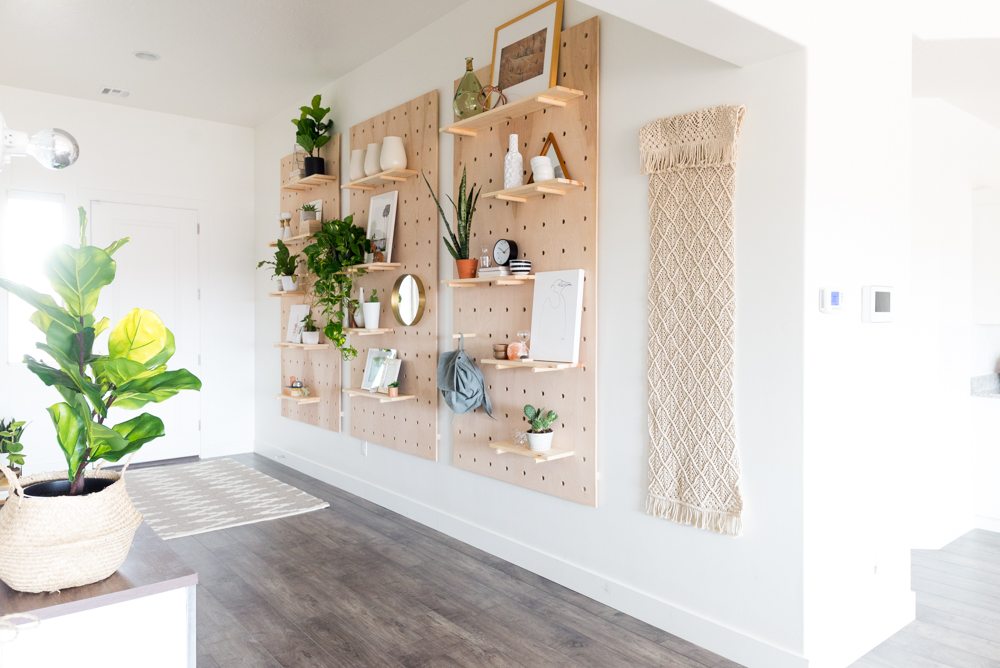
Lets talk about the entryway shall we? Aspen’s entryway is HUGE. The ceilings are tall and the wall is expansive. Its just this giant massive blank space that dwarfed anything that got near it. We’re talking a huge piece of art looking like a postage stamp type dilemma. Walls like this can be the downfall of all of your decorating plans because its just so much space to cover, what do you do with it?!
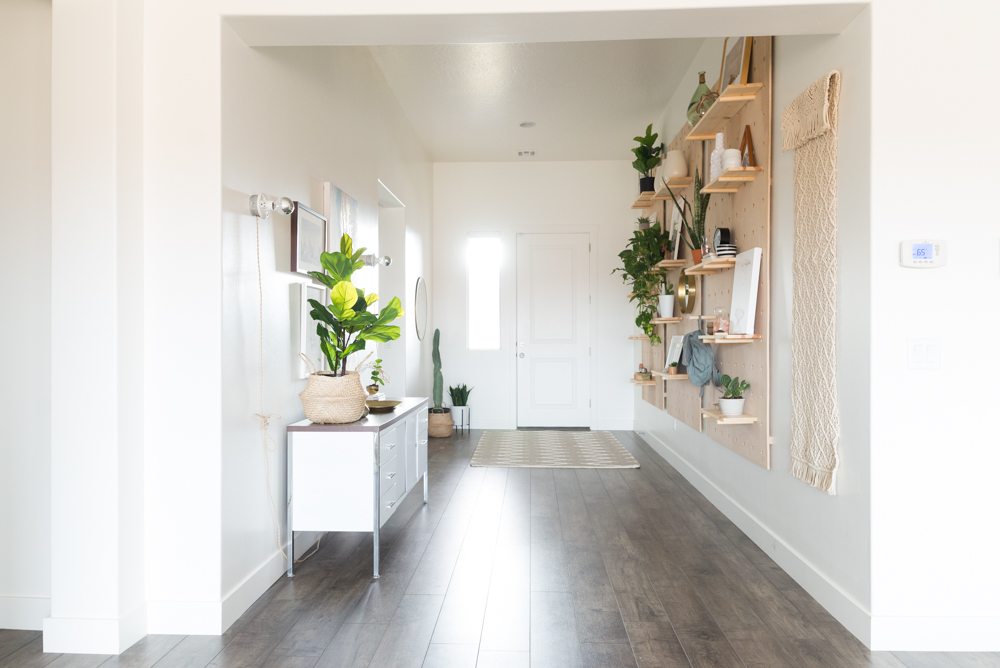
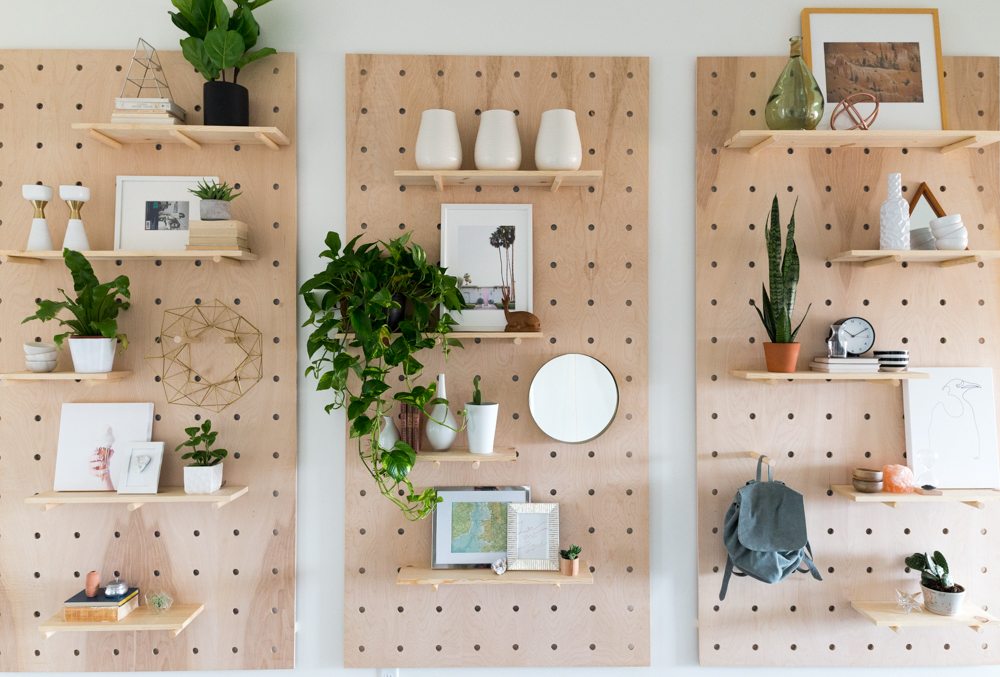
I decided to break it up and maximize its size all at the same time by adding a trio of oversized pegboards. These are full 4×8 sheets of birch ply that we drilled 1″ holes into. It looks freaking AMAZING and was a really easy project (tutorial coming soon!!) The pegs are interchangeable and can be used and adjusted depending on the way it is staged.
The lights are a quick DIY with the lamp cord from the VR shop and basic pull chain ceramic ceiling sockets + metal junction boxes.

You can see the full dining room + kitchen reveal here!
Original article and pictures take vintagerevivals.com site
Комментариев нет:
Отправить комментарий